背景
对于我这种潜水党来说, 查看多个聊天工具的消息一直是个头大的问题, 需要安装多个客户端, 跨平台的体验不佳, 以及都懒得吐嘈的微信聊天记录同步备份等, 很是困扰.
后来发现了 EH Forwarder Bot 后真的是打开了新世界的大门, 原来还可以这样子玩的, 直接通过 Telegram 来收发 QQ 和微信的消息!
当时的 Plugin 还是通过 WebQQ 和微信网页版协议来实现的, 局限蛮多, 不少消息格式都不支持, 所以干脆 Hook 了这俩的 Mac 应用对接起来, 扔在我的老 Macbook 上7x24小时跑着, 就这么用了好多年…
当然, 这个方案对我来说, 还是有一些缺点的, 主要是受限于 Telegram 的机制, 所有消息的收发都是通过 Bot 进行的, 导致会将所有的消息混杂在一起, 虽然可以通过绑定群的方式来规避掉一些, 但类似群内各人的消息还是同个 Bot 发出来的, 还是不够完美.
月初的时候看了下 Matrix 的文档, 发现它的 Application Services 机制非常强大, 可以方便实现到各外部系统的桥接, 而这个就是我想要的! 于是照着目前实现的比较完善的 Mautrix 相关的代码, 整出了 matrix-qq 和 matrix-wechat.
这次的话, 就不走 Mac Hook 的方式了, QQ 这边选的是 MiraiGo, 微信则是走的 Win 的 ComWeChatRobot.
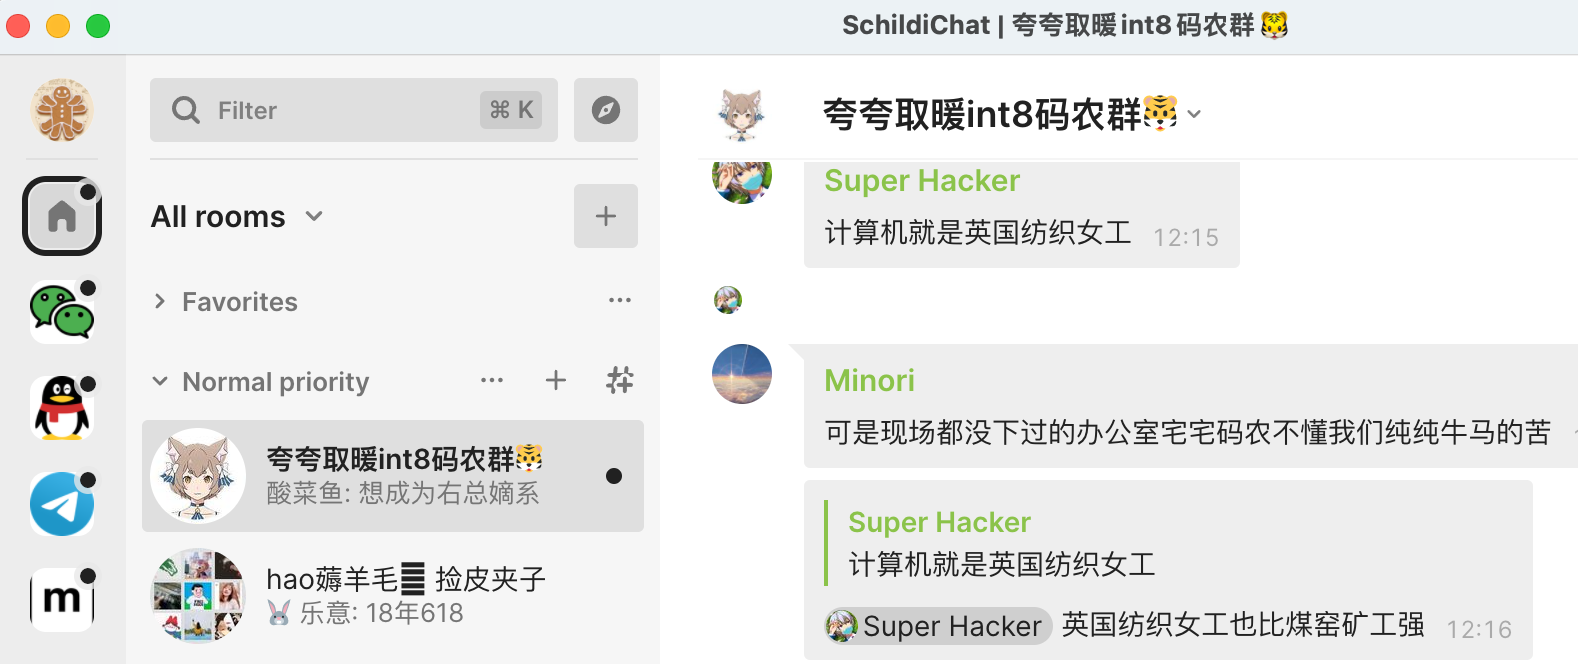
最终的效果如下图:

部署
因为是个人使用的, 不想整的太复杂, 简单和稳定就好, Matrix 服务端选的 Synapse, 代理是 Caddy2, 通过 Dokcer Compose 部署.
下面的步骤是以服务器名 matrix.example.com 搭建, 通过 Delegation 机制, 用户和房间的 ID 都为 *:example.com 的形式.
先放一下最终的目录结构 (完整版 docker-compose.yml)
 1
 2
 3
 4
 5
 6
 7
 8
 9
10
11
12
13
14
15
16
17
18
19
20
21
22
23
24
25
| .
├── caddy
│ ├── Caddyfile
│ ├── config
│ └── data
├── docker-compose.yml
├── matrix-qq
│ ├── config.yaml
│ └── registration.yaml
├── matrix-wechat
│ ├── config.yaml
│ └── registration.yaml
├── postgres
│ ├── create_db.sh
│ └── data
└── synapse
├── example.com.log.config
├── example.com.signing.key
├── homeserver.yaml
├── logs
├── media_store
├── qq-registration.yaml
├── shared_secret_authenticator.py
├── uploads
└── wechat-registration.yaml
|
Postgres
数据库选择 Postgres, 默认的 SQLite 性能挺差的…
建立对应的目录和文件
1
2
3
| mkdir -p postgres/data
touch postgres/create_db.sh
touch docker-compose.yml
|
然后修改以下文件的内容
postgres/create_db.sh
1
2
3
4
5
| #!/bin/sh
createdb -U synapse_user -O synapse_user --encoding=UTF8 --locale=C --template=template0 synapse
createdb -U synapse_user -O synapse_user matrix_qq
createdb -U synapse_user -O synapse_user matrix_wechat
|
docker-compose.yml
 1
 2
 3
 4
 5
 6
 7
 8
 9
10
11
12
13
14
15
16
17
18
19
20
21
22
23
24
25
| version: "3.4"
services:
postgres:
hostname: postgres
container_name: postgres
image: postgres:14
restart: always
environment:
TZ: Asia/Shanghai
POSTGRES_USER: synapse_user
POSTGRES_PASSWORD: hello
volumes:
- ./postgres/create_db.sh:/docker-entrypoint-initdb.d/20-create_db.sh
- ./postgres/data:/var/lib/postgresql/data
healthcheck:
test: ["CMD-SHELL", "pg_isready -U synapse_user"]
interval: 5s
timeout: 5s
retries: 5
networks:
- matrix-net
networks:
matrix-net:
attachable: true
|
执行 docker-compose up 启动看看是否正常 (顺带初始化库).
Synapse
建立对应的目录
1
2
3
| mkdir -p synapse/logs
mkdir synapse/media_store
mkdir synapse/uploads
|
生成初始化配置
1
2
3
4
5
| docker run --rm \
-v `pwd`/synapse:/data \
-e SYNAPSE_SERVER_NAME=example.com \
-e SYNAPSE_REPORT_STATS=no \
matrixdotorg/synapse:latest generate
|
将对应目录的属主改成991
1
| sudo chown 991:991 synapse/logs synapse/media_store synapse/uploads
|
然后修改以下文件的内容
synapse/example.com.log.config
 1
 2
 3
 4
 5
 6
 7
 8
 9
10
11
12
13
14
15
16
17
18
19
20
21
22
23
24
25
26
27
28
29
30
31
32
33
| version: 1
formatters:
precise:
format: '%(asctime)s - %(name)s - %(lineno)d - %(levelname)s - %(request)s - %(message)s'
handlers:
console:
class: logging.StreamHandler
formatter: precise
file:
class: logging.handlers.TimedRotatingFileHandler
formatter: precise
filename: /data/logs/homeserver.log
when: midnight
backupCount: 7
encoding: utf8
buffer:
class: synapse.logging.handlers.PeriodicallyFlushingMemoryHandler
target: file
capacity: 10
flushLevel: 30
period: 5
loggers:
synapse.storage.SQL:
level: INFO
root:
level: INFO
handlers: [buffer]
disable_existing_loggers: false
|
synapse/homeserver.yaml
 1
 2
 3
 4
 5
 6
 7
 8
 9
10
11
12
13
14
15
16
17
18
19
20
21
22
23
24
25
26
27
28
29
30
31
32
33
34
35
36
37
38
39
40
41
42
43
44
45
46
47
48
49
50
51
52
53
54
55
56
57
58
59
60
61
62
| server_name: "example.com"
public_baseurl: "https://matrix.example.com"
serve_server_wellknown: true
pid_file: /data/homeserver.pid
listeners:
- port: 8008
tls: false
type: http
x_forwarded: true
resources:
- names: [client, federation]
compress: false
database:
name: psycopg2
txn_limit: 10000
args:
user: synapse_user
password: hello
database: synapse
host: postgres
port: 5432
cp_min: 5
cp_max: 10
log_config: "/data/example.com.log.config"
media_store_path: /data/media_store
uploads_path: /data/uploads
registration_shared_secret: "<your shared srcret>"
report_stats: false
macaroon_secret_key: "<your macaroon key>"
form_secret: "<your from secret>"
signing_key_path: "/data/example.com.signing.key"
trusted_key_servers:
- server_name: "matrix.org"
url_preview_enabled: true
url_preview_ip_range_blacklist:
- '127.0.0.0/8'
- '10.0.0.0/8'
- '172.16.0.0/12'
- '192.168.0.0/16'
- '100.64.0.0/10'
- '192.0.0.0/24'
- '169.254.0.0/16'
- '192.88.99.0/24'
- '198.18.0.0/15'
- '192.0.2.0/24'
- '198.51.100.0/24'
- '203.0.113.0/24'
- '224.0.0.0/4'
- '::1/128'
- 'fe80::/10'
- 'fc00::/7'
- '2001:db8::/32'
- 'ff00::/8'
- 'fec0::/10'
url_preview_url_blacklist:
- scheme: 'http'
- netloc: '^[0-9]+\.[0-9]+\.[0-9]+\.[0-9]+$'
|
docker-compose.yml 添加以下内容
 1
 2
 3
 4
 5
 6
 7
 8
 9
10
11
12
13
14
15
16
17
18
19
20
| synapse:
hostname: synapse
container_name: synapse
image: matrixdotorg/synapse:latest
restart: unless-stopped
depends_on:
postgres:
condition: service_healthy
environment:
TZ: Asia/Shanghai
volumes:
- ./synapse:/data
healthcheck:
test: ["CMD", "curl", "-fSs", "http://localhost:8008/health"]
interval: 15s
timeout: 5s
retries: 3
start_period: 5s
networks:
- matrix-net
|
继续 docker-compose up 启动看看.
Warning
请保管好 example.com.signing.key 这个文件
Caddy
建立对应的目录和文件
1
2
3
| mkdir -p caddy/config
mkdir caddy/data
touch caddy/Caddyfile
|
然后修改以下文件的内容
caddy/Caddyfile
 1
 2
 3
 4
 5
 6
 7
 8
 9
10
11
12
13
14
15
16
17
18
19
20
21
22
23
24
25
| {
email admin@example.com
}
example.com {
header /.well-known/matrix/* Content-Type application/json
header /.well-known/matrix/* Access-Control-Allow-Origin *
respond /.well-known/matrix/server `{"m.server": "matrix.example.com:443"}`
respond /.well-known/matrix/client `{"m.homeserver":{"base_url":"https://matrix.example.com"}}`
}
matrix.example.com {
log {
level INFO
output file /data/access.log {
roll_size 100MB
roll_local_time
roll_keep 10
}
}
reverse_proxy /_matrix/* synapse:8008
reverse_proxy /_synapse/client/* synapse:8008
}
|
doocker-compose.yml 添加以下内容
 1
 2
 3
 4
 5
 6
 7
 8
 9
10
11
12
13
14
15
| caddy:
image: caddy:2
hostname: caddy
container_name: caddy
ports:
- 80:80
- 443:443
environment:
TZ: Asia/Shanghai
volumes:
- ./caddy/Caddyfile:/etc/caddy/Caddyfile:ro
- ./caddy/config:/config
- ./caddy/data:/data
networks:
- matrix-net
|
运行 docker-compose up 看看.
访问 https://matrix.example.com/_matrix/federation/v1/version 看能否有返回.
然后到 https://federationtester.matrix.org/ 输入服务器名 (比如 exmaple.com) 看看 federation 是否正常, 绿色就可以.
在服务器上注册个帐号
1
| docker exec -it synapse register_new_matrix_user http://localhost:8008 -c /data/homeserver.yaml
|
通过 https://app.element.io/ 登录看看, 服务器选择 matrix.example.com, 用新建的用户登录.
如果没啥问题, 那么一个可用的 Matrix 服务就好了, 接下来就是 QQ 和微信的桥接了.
Shared Secret Authenticator
先把 Shared Secret Authenticator 给启用了, 这样 double puppeting 就不需要手动绑定 Matrix 帐号
1
2
| wget https://raw.githubusercontent.com/devture/matrix-synapse-shared-secret-auth/master/shared_secret_authenticator.py -O synapse/shared_secret_authenticator.py
sudo chown 991:991 synapse/shared_secret_authenticator.py
|
编辑 docker-compose.yml, 在 synapse 的 volumes 加入
1
| - ./synapse/shared_secret_authenticator.py:/usr/local/lib/python3.9/site-packages/shared_secret_authenticator.py
|
synapse/homeserver.yaml 添加以下内容 (这里的 Key 后续在桥接配置的时候要用到)
1
2
3
4
5
| modules:
- module: shared_secret_authenticator.SharedSecretAuthProvider
config:
shared_secret: "<your double puppeting key>"
m_login_password_support_enabled: true
|
老规矩, docker-compose up 启动起来看看是否一切正常
Matrix-QQ
执行 mkdir matrix-qq 创建目录
生成初始的 matrix-qq/config.yaml
1
| docker run --rm -v `pwd`/matrix-qq:/data:z lxduo/matrix-qq:latest
|
然后这个文件主要修改的内容是
 1
 2
 3
 4
 5
 6
 7
 8
 9
10
11
12
13
14
15
16
17
18
| homeserver:
address: http://synapse:8008
domain: example.com
appservice:
address: http://matrix-qq:17777
database:
uri: postgres://synapse_user:hello@postgres/matrix_qq?sslmode=disable
bridge:
double_puppet_server_map:
example.com: https://matrix.example.com
login_shared_secret_map:
example.com: "<your double puppeting key>"
permissions:
"example.com": user
"@admin:example.com": admin
|
再运行一次生成注册文件
1
| docker run --rm -v `pwd`/matrix-qq:/data:z lxduo/matrix-qq:latest
|
把注册文件拷到 synpase 目录, 同时修改属主
1
2
| cp matrix-qq/registration.yaml synapse/qq-registration.yaml
sudo chown 991:991 synapse/qq-registration.yaml
|
编辑 synapse/homeserver.yaml, 加入
1
2
| app_service_config_files:
- /data/qq-registration.yaml
|
编辑 docker-compose.yml, 加入
 1
 2
 3
 4
 5
 6
 7
 8
 9
10
11
12
| matrix-qq:
hostname: matrix-qq
container_name: matrix-qq
image: lxduo/matrix-qq:latest
restart: unless-stopped
depends_on:
synapse:
condition: service_healthy
volumes:
- ./matrix-qq:/data
networks:
- matrix-net
|
启动 docker-compose up
新建和 @qqbot:example.com 的聊天, 输入 help 查看使用帮助
Matrix-Wechat
执行 mkdir matrix-wechat 创建目录
生成初始的 matrix-wechat/config.yaml
1
| docker run --rm -v `pwd`/matrix-wechat:/data:z lxduo/matrix-wechat:2
|
然后这个文件主要修改的内容是
 1
 2
 3
 4
 5
 6
 7
 8
 9
10
11
12
13
14
15
16
17
18
19
20
| homeserver:
address: http://synapse:8008
domain: example.com
appservice:
address: http://matrix-wechat:17778
database:
uri: postgres://synapse_user:hello@postgres/matrix_wechat?sslmode=disable
bridge:
listen_secret: "<your wechat agent key>"
double_puppet_server_map:
example.com: https://matrix.example.com
login_shared_secret_map:
example.com: "<your double puppeting key>"
permissions:
"example.com": user
"@admin:example.com": admin
|
再运行一次生成注册文件
1
| docker run --rm -v `pwd`/matrix-wechat:/data:z lxduo/matrix-wechat:2
|
编辑 matrix-wechat/registration.yaml, 修改里面的正则
1
2
3
4
5
6
| namespaces:
users:
- regex: ^@wechatbot:example\.com$
exclusive: true
- regex: ^@_wechat_.+:example\.com$
exclusive: true
|
把注册文件拷到 synpase 目录, 同时修改属主
1
2
| cp matrix-wechat/registration.yaml synapse/wechat-registration.yaml
sudo chown 991:991 synapse/wechat-registration.yaml
|
编辑 synapse/homeserver.yaml, 在 app_service_config_files 里加入
1
| - /data/wechat-registration.yaml
|
编辑 docker-compose.yml, 加入
 1
 2
 3
 4
 5
 6
 7
 8
 9
10
11
12
| matrix-wechat:
hostname: matrix-wechat
container_name: matrix-wechat
image: lxduo/matrix-wechat:2
restart: unless-stopped
depends_on:
synapse:
condition: service_healthy
volumes:
- ./matrix-wechat:/data
networks:
- matrix-net
|
编辑 caddy/Caddyfile, 加入
1
| reverse_proxy /_wechat/* matrix-wechat:20002
|
启动 docker-compose up
嗯, 还没完… 这里还需要有个 Agent 来配合…
Matrix-Wechat-Agent
可以用通过 Docoker 部署, 不过毕竟是 Wine 来运行的, 稳定性一般, 也可以用 Windows 的主机来运行
Linux 主机
执行 mkdir matrix-wechat-agent 创建目录
新建 matrix-wechat-agent/configure.yaml
 1
 2
 3
 4
 5
 6
 7
 8
 9
10
11
12
13
| wechat:
version: 3.8.1.26
listen_port: 22222
init_timeout: 10s
request_timeout: 30s
service:
addr: ws://matrix-wechat:20002
secret: "<your wechat agent key>"
ping_interval: 30s
log:
level: info
|
编辑 docker-compose.yml, 加入
 1
 2
 3
 4
 5
 6
 7
 8
 9
10
11
12
13
14
15
16
17
18
| matrix-wechat-agent:
hostname: matrix-wechat-agent
container_name: matrix-wechat-agent
image: lxduo/matrix-wechat-agent:latest
restart: unless-stopped
depends_on:
- matrix-wechat
environment:
TZ: Asia/Shanghai
volumes:
- ./matrix-wechat-agent/configure.yaml:/home/user/matrix-wechat-agent/configure.yaml
#shm_size: "1gb"
#devices:
# - /dev/dri:/dev/dri
#ports:
# - 15905:5905
networks:
- matrix-net
|
Tip
如果遇到 Docker Engine 的兼容性问题, 加上以下配置试试
1
2
| security_opt:
- seccomp:unconfined
|
如果微信运行的不稳定, 把注释的 shm_size 打开看看
Windows 主机
同上创建一个 configure.yaml 文件
从 duo/matrix-wechat-agent 下载得到 matrix-wechat-agent.exe
从 ljc545w/ComWeChatRobot 下载解压得到 SWeChatRobot.dll 和 wxDriver.dll
将 configure.yaml, matrix-wechat-agent.exe 和 SWeChatRobot.dll 以及 wxDriver.dll 置于同一目录
安装 Visual C++ Redistributable (https://docs.microsoft.com/en-US/cpp/windows/latest-supported-vc-redist?view=msvc-170)
安装微信 3.7.0.30 版本
最后执行 matrix-wechat-agent.exe
新建和 @wechatbot:example.com 的聊天,输入 help 查看使用帮助